
Rebel Tennis Takedown
SAFETY CHECKLIST OVERVIEW

ASSEMBLY OVERVIEW
Renders are indicative of possible configurations only. These configurations may vary store to store based on space allocated and store layout.
Installers please click button to fill out safety document.
Assembly Overview - Step 1.
REBEL TENNIS TAKEDOWN

Ensure space is ready for installation. Measure up zone to ensure it matches plans.


Assembly Overview - Step 2.
REBEL TENNIS TAKEDOWN
Header panel alignment (ADULT)

Back panel alignment (ADULT)


Wear gloves to avoid any pinch points while installing back panels. Install bottom back panel first four slots from the floor with another back panel fitted directly above.
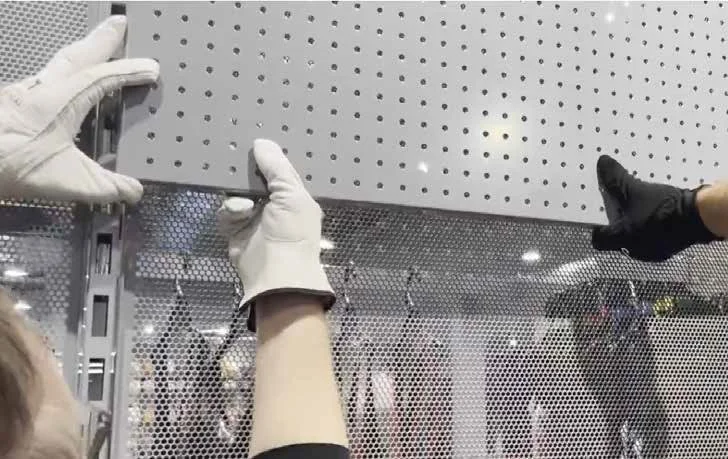

Wear gloves to avoid any pinch points while installing back panels. It is recommended two people install this piece using a ladder. Bottom header panel to be installed six slots from the bottom back panels. This should line up to the horizontal beam on the side panel.
Assembly Overview - Step 3.
REBEL TENNIS TAKEDOWN
Back panel alignment (JUNIOR)

Wear gloves to avoid any pinch points while installing back panels.
Modular system allows the Junior display to be assembled in multiple configurations depending on the store layout and size allocated.
Bottom back panel can be fitted to first slot with next panels fitting directly above.


Assembly Overview - Step 4.
REBEL TENNIS TAKEDOWN


Magnetic prints to be applied directly to back panels.

PART 1
PART 2
*NOTE: PANEL IS NOW INSTALLED
SEPARATELY IN 2 PARTS
Printed fabric frame fits to vertical slotted posts with brackets that mimic back panel hooks. Line this frame up with back panels.
Assembly Overview - Step 5.
REBEL TENNIS TAKEDOWN
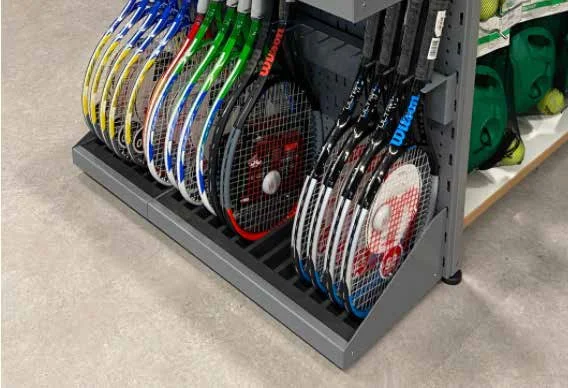
Racquet Trough Base - Size 1


Racquet Trough Base - Size 2 (x2 Pieces)

Assembly Overview - Step 6.
REBEL TENNIS TAKEDOWN


Racquet trough base screws together using an allen key and slots into back panel.
For the base, racquet trough base is recommended to fit to slots 2 and 3 from the bottom of the back panel (sits flush with the base). The racquet trough handle bracket is recommended to sit 4 and 5 slots above the racquet trough base.
The second racquet trough base can sit 5 and 6 slots above this but will depend on the racquet handle length. The unit is fully modular so these are only recommendations, the unit can be used in any configuration.
Assembly Overview - Step 7.
REBEL TENNIS TAKEDOWN
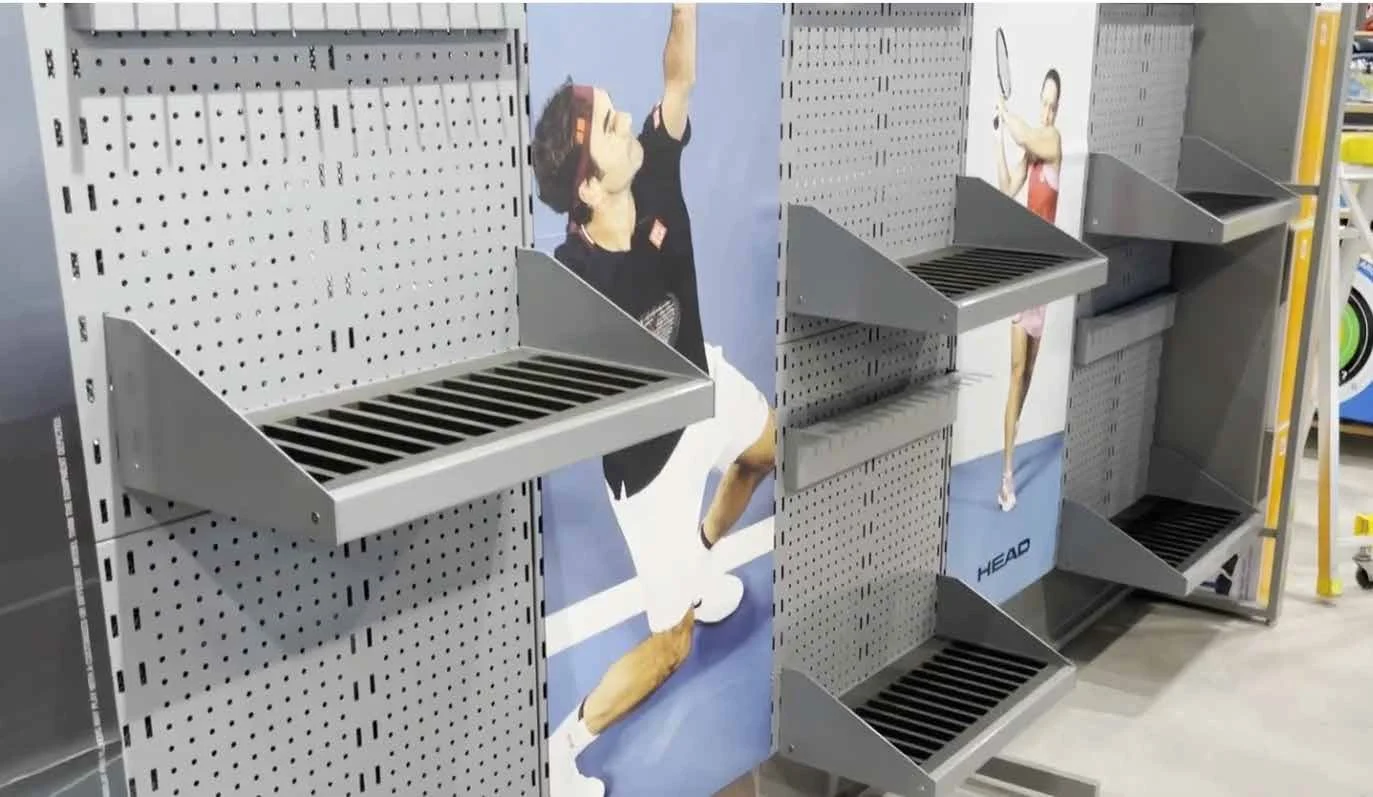
Racquet Trough Handle Bracket


Accessory Tray


The racquet trough handle bracket is recommended to sit 4 and 5 slots above the racquet trough base. This may vary base on racquet handle length.

The accessory tray can be slotted into the back panels wherever required. We suggest the bottom of the top, back panel for visibility.
Assembly Overview - Step 8.
REBEL TENNIS TAKEDOWN
Magnetic Racquet Support


Magnetic racquet support attaches to back panel directly or over prints.
Assembly Overview - Step 9.
REBEL TENNIS TAKEDOWN


Load displays up with stock.